The last video I paid a human to edit cost me over $200, and the money was the easy part. The hard part was the weeks it took to find one editor who cut the way I actually wanted. Messages back and forth, negotiating the rate, setting the deadline, writing out every single intro beat by hand, and still getting a file back that missed the point. Then paying double the quote to have it re-cut.
So I stopped hiring. What follows is the workflow I use to automate video editing with AI: no editor, no new tool to buy, just the Claude Code or Codex subscription you probably already pay for. The video this came from was edited three separate ways, in three completely different styles, and I never touched a timeline.
Editing isn't solved. It's the last thing standing between having something to say and having it published, and once it falls the barrier to creating drops to roughly zero. This is the closest thing to solved that exists right now, and it is honest about where it stops.
What you'll get out of this
- The three-job framework (cut, dress, polish) and which of the three AI is actually good at
- The exact cutting prompt, including the millisecond constraint that keeps intros sharp
- Why asking Claude to make the animation is the wrong move, and the prompt-relay that works instead
- The one rule that stops a polish pass from wrecking your project file
- An honest read on what this can't do, and which subscriptions to cancel today
Why paying an editor broke before the editing did
Hiring is not a money problem, it's a latency problem. Every round trip with a human editor costs a day: you write the brief, they interpret it, you watch, you write notes on a cut you'd have fixed in four minutes yourself. Multiply that by the two or three rounds it takes to land a cadence and your video is a week old before anyone sees it.
The instinct is to buy a tool instead. I did that too: an auto-cut plugin inside Premiere at $20 a month, then Descript and Opus at around $50 a month on top, bought purely on the hope of clawing back half an hour. If a $50 tool bought back the hour I spend editing, I'd pay a thousand. That's not where we are.
What the cut, dress, polish framework actually splits
Break editing into three jobs and it stops being one intimidating blob.
- Cut is killing dead space.
- Dress is adding the B-roll and the graphics.
- Polish is the final layer: sounds, captions, effects.
Raw footage doesn't change in any of the three. Cut it tight, dress it up, polish it, and the same forty minutes of talking becomes something people finish.
Hold onto one line all the way through, because it's the whole point: AI does the labor, you keep the taste. Every decision below is an application of that split.
How to cut dead space without buying a cutting tool
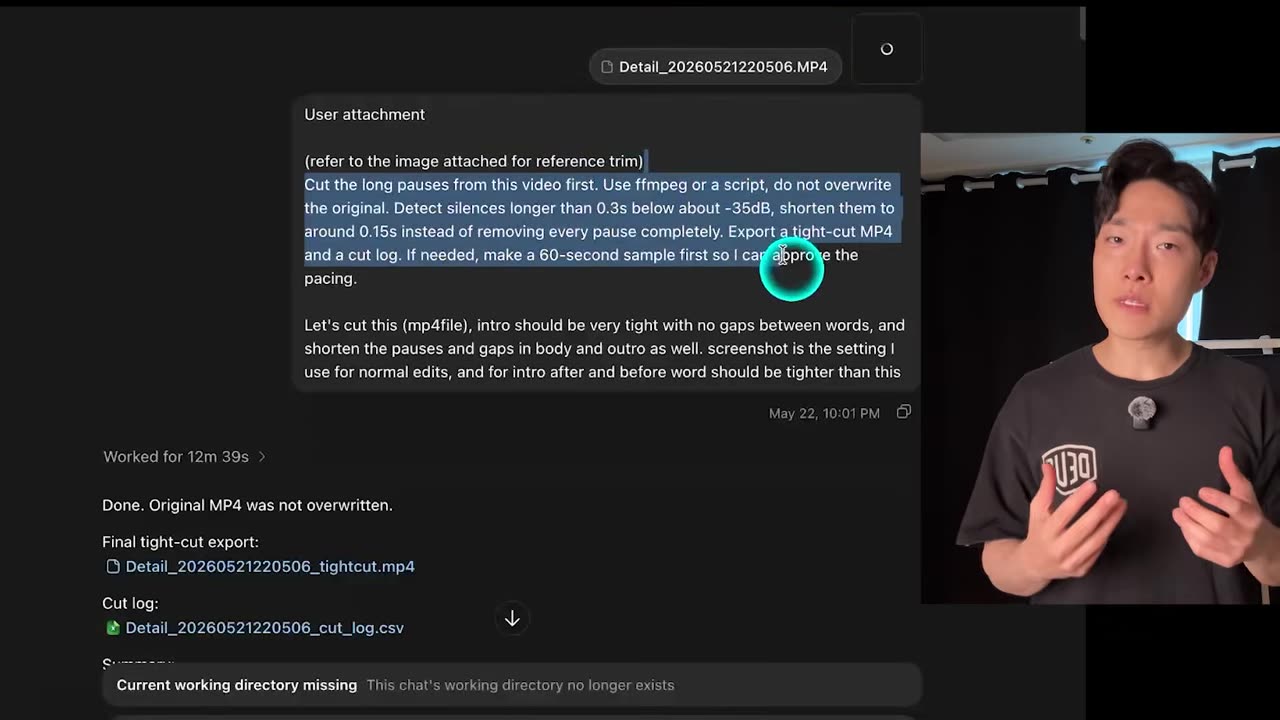
Part one is a saw, and it's the part that works cleanly today. You drop the raw long-form file in and you tell it how to cut. The instructions carry all the weight, so don't be shy about the specifics:
# the cut prompt
Cut the dead space, but keep the pauses natural.
Target ~0.5s between lines — depends how fast I'm talking.
Give me exact timestamps down to the millisecond.
Nothing longer than 0.3s in the intro. The intro stays sharp.
Then read the first pass like a viewer, not an editor. If it's still draggy, you don't reprompt from scratch. You say do one more round, cut it a little tighter, or hand over the exact seconds you want back. It returns a clean pass. That iteration loop is the entire advantage.
I still hand-cut some things. I want my own rhythm of speaking. Sometimes a pause should sit, the line should land and breathe. For that I go in at 0.0 milliseconds myself, and yes, it takes days. That's me being obsessive. For 90% of what you're making, part one is finished business. You should never hand-cut dead air again.
Why the $50 cutting tools cut worse than an agent
I paid for the dedicated tools first, because that's the obvious move. A cut plugin inside Premiere at $20 a month. Descript and Opus at around $50 a month, bought to see whether a purpose-built product beat a general one.
They don't. They're the lower-spec version. Under the hood they run a cheaper, dumber model on a single fixed pass, and you get exactly one opinion with no way to argue with it. With Claude Code or Codex you run a rough cut and a natural cut, put them side by side, and pick the cadence you want. That's not a nicer tool. That's a whole job leaving the building.
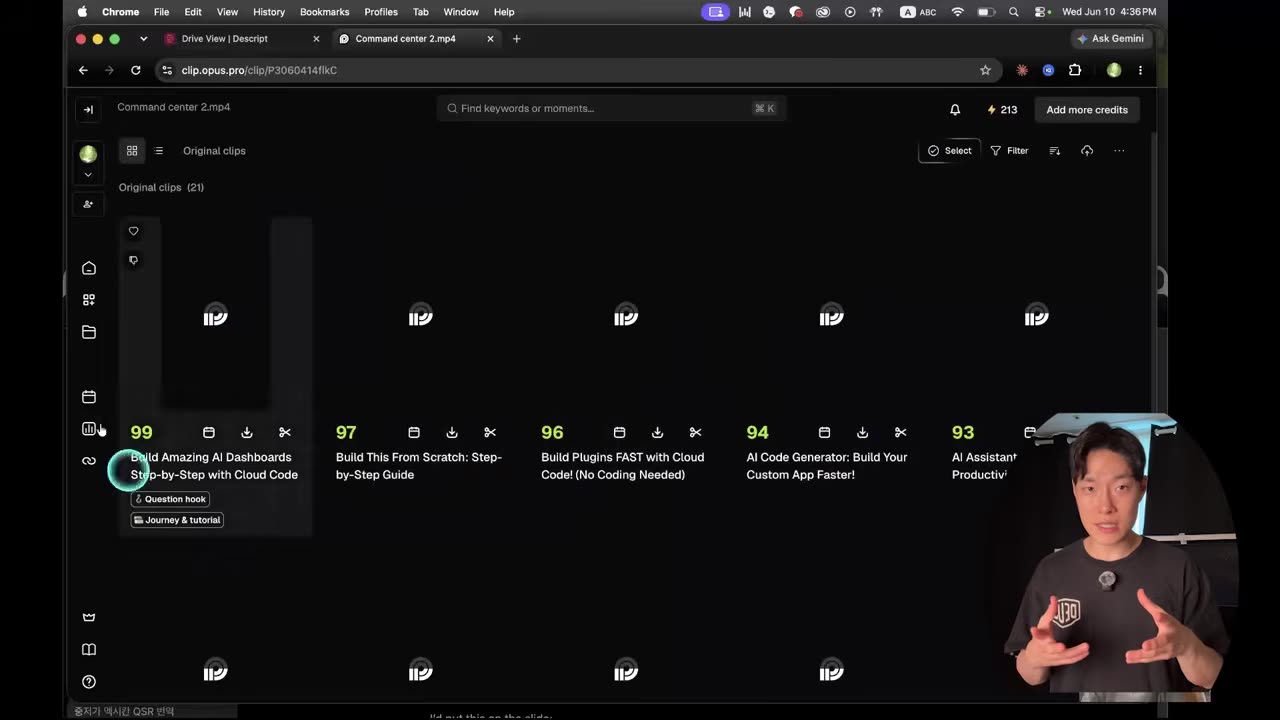
If you're paying monthly for a one-click editor right now, cancel it. I kept mine running purely to test them, and they never bought back the 30 or 40 minutes that would have justified the spend. The same logic applies to any agent you're overpaying to run — see why my agent was burning $18 a day.
How to get B-roll and graphics that aren't AI slop
Dressing is the highest-return thing you can do for retention, because a good visual is worth a paragraph of me talking. It's also where I lose the most time, because I refuse to put generic AI slop animation on the channel.
Here's the move, and it isn't the obvious one: do not ask Claude or Codex to make the animation directly. They are genuinely horrible at it. I have tried every way I can think of to keep it inside the terminal so I never have to open another tool, and it does not work. Instead, have the model write you the prompt, and paste that into a design tool: Claude design, which I've covered in depth, Lovable, whatever's free.
The secret to something that isn't slop is guardrails: a wall of don'ts. Watch how specific this gets:
# the design brief, as handed to the design tool
Style: chalkboard graphic on a pre-lit canvas background.
Color: one only — chocolate.
Feel: chocolate chalk scratching across canvas, rough texture,
       like a hand actually wrote it.
Never: neon, purple glow, gradients, 3D, "futuristic".
Hand it something vague ("make it cool, dark, futuristic") and you know exactly what comes back. A black screen, a purple neon sign, a glowing exclamation mark. So direct it hard. The don'ts list is just me telling it everything I hate so it stops guessing.
The places worth spending this on are your intro, your outro, and your chapter banners and transitions. Instead of my face and a caption, each new chapter gets a clean graphic. People instantly know where they are and that the video is moving.
Better retention, better comprehension, basically no extra time once the brief exists. If you want to push the same idea into full animated pages, the Nanobanana 2 and Claude design build is the extended version.
This part is easier to see than to read. Jump to 5:24 in the build to watch me read the chocolate-chalk brief out loud and then see the graphic it produced — plus the three different B-roll styles this same video was dressed in.
Polish: the pass AI still can't do for you
Captions are trivial. Pull the transcript, drop it in, done. The rest of the polish is where AI still needs to catch up, because the final touch isn't a task, it's an orchestration. Where do you zoom in? Where does a sound effect land? Where do you get weird, get funny, drop the meme? The model has no instinct for that. Not yet.
So delegate the labor and keep the judgment. The prompt:
# the asset-folder prompt
Scan the whole cut. Mark every spot where a sound effect
or a transition would land. Give me the timestamps.
Hand me everything as a separate asset folder so I can
drag and drop. Do not merge anything into the video.
That last line is the trick, and it's the one people skip. Never let it bake the effects into your render. When it merges and blends everything, the result is messy and painful to fix, and you won't like most of the placements anyway. Keep the assets loose and the timestamps in a list. It does the fetching and the marking. You do the placing and the filtering.
The scanning half of this only works because the model can genuinely read what's in the footage, the same capability I use for research, covered in giving Claude Code the ability to watch any video.
What this workflow can't do, honestly
I'm not going to pretend this gets you a polished, professional edit. It doesn't. You are not getting the perfect infographics, the buttery zooms, or the custom sound design a real pro gives you. What you get is a stitched-together edit that's genuinely engaging at a fraction of the time and cost. That's the realistic frame.
If a $50 tool buys back the hour I spend editing, I'll pay a thousand. That's not where we are.
My own videos aren't the most polished on the platform, and I spend far more time on them than I should. A dozen takes. Thrown-away scripts. Too much ad-lib. I cut roughly 70% of my own footage because I digress. The three passes above don't fix any of that. They just stop me paying someone else a week's latency to do the mechanical part badly.
If editing ever gets properly solved end-to-end, I'll be the first to say so, loudly. Until then: cut, dress, polish. AI does the labor, you keep the taste.
Watch the three edits happen in one video
The build walks through all three passes on real footage — and the video itself is cut three different ways in three different styles, none of which I touched a timeline for. Try spotting where each style switches. The prompts are free either way.
Frequently asked questions
Can Claude Code actually edit video, or does it only give you timestamps?
It reads your footage and returns an edit decision: exact cut points down to the millisecond, plus marked spots for sound effects and transitions. You apply those in your editor, or let it render the cut. For dressing and polish you want the timestamps and assets, not a rendered file, so you stay in control of placement.
What prompt do you use to cut dead space out of a video?
Ask it to cut dead space but keep the pauses natural, target around half a second depending on how fast you talk, return exact timestamps down to the millisecond, and allow nothing longer than 0.3 seconds in the intro. Then read the first pass and say do one more round, tighter, until the cadence is right.
Is Claude Code better than Descript or Opus for cutting a video?
For cutting, yes. I paid about $50 a month across Descript and Opus and they cut worse, because they run one fixed pass with a cheaper model and no room to argue. With Claude Code or Codex you can run multiple rounds, A/B a rough cut against a natural cut, and dictate the exact pause length.
Why should you never let AI bake the effects into your video?
Once sound effects and transitions are merged into the render, they are painful to fix, and you will disagree with most of the placements anyway. Ask for a separate asset folder plus a timestamp list instead. The AI does the fetching and the marking, you do the placing and the filtering, and nothing is destructive.
Does an AI editing workflow replace a professional video editor?
No, and pretending otherwise wastes your money. You will not get the perfect infographics, the buttery zooms, or the custom sound design a real pro delivers. What you get is a genuinely watchable edit at a fraction of the time and cost, which for most videos is the trade worth making.
Everything here runs on tools you can start with today: Claude Code or Codex, plus whatever design tool you already have open. More build logs live on the home page.